
Sword & Shield / Throwing Hatchet PvP Build
Brimstone Sands


A well rounded light armor build that uses a throwing Hatchet setup. This build is fast, hits very hard, has great healing power, and tons of good counters / utility abilities that make it great for surviving in PvP.
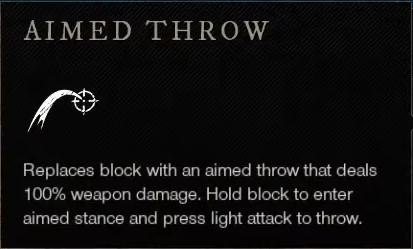
The throwing Hatchet can deal a lot of damage, while being able to apply snares, roots, and rends easily. Aiming a throwing Hatchet can be tough however and will require some practice to be really effective. With a bit of patience, you can learn to deal nasty ranged combos while being able to quickly close the gap for huge damage combos with the Sword & Shield.
I hope you guys enjoy this build, it has made me fall in love with throwing Hatchet as a ranged weapon!
Check out a video guide with gameplay for this build!


Both weapons scale from primarily from STR and secondarily from DEX, and since this build is very mobile having at least 150 DEX goes a long way towards its stamina sustain. The rest of the offensive points are put into STR.
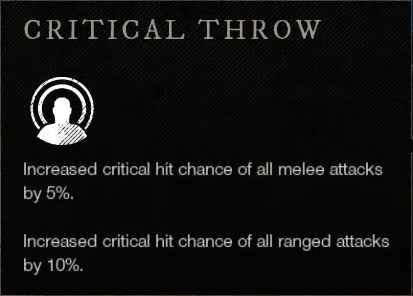
The 50 STR passive is great for increasing outgoing melee damage, while both the 100 point STR and DEX passives will increase slashing and thrust damage respectively. This build also has a very good critical hit rate thanks to the 50 DEX passive plus all the keen items in its gear. Finally the 200 STR passive is a great damage boost as this build has tons of stuns, roots, and snares to keep that damage bonus up!
As always having 150 CON for the additional critical resistance is huge for survival in PvP, especially in light armor. Since this build doesn’t use the life saving hatchet passive I wouldn’t recommend going for any less CON in PvP.
The resists of this setup reflect the fact that we are playing in a ranged meta right now, focusing on reducing incoming Bow, Musket and Fire Staff damage. These resists are great for game modes like Outpost Rush, but you can always go for a more even spread if you prefer that instead!
Strength
50: +10% damage to melee weapon light & heavy attacks. +10% mining speed.
100: +5% slash damage. +20 encumbrance.
150: +50% stamina damage from melee weapon light and heavy attacks. -10% decrease in weight of mined items.
200: +10% damage on stunned, slowed, or rooted enemies. +10% mining speed.
Dexterity
50: +10% chance to critical hit. +10% skinning speed.
100: +5% thrust damage. +20% haste for 3s after skinning.
150: Dodges cost 10 less stamina. -10% decrease in weight of skinned items.
Constitution
50: All health consumables 20% stronger. +10% logging speed.
100: Increase max health by 10% of your physical armor. -10% reduction on durability loss for tools.
150: -10% to critical damage taken. -10% decrease in weight of logging items.
Equipment
The Sword and Shield are setup to deal huge damage when you close the gap thanks to Empowering Leaping Strike being on the sword. Keenly Jagged or Keenly Empowered are the preferred damage buffing perks here, and Vicious + Keen make a great combo for damage too. Ideally I would have Rogue over Vicious here if I could! With Fortifying Shield Rush on the shield you can have easy access to a powerful 33% Fortify, and Sturdy is always great on a shield to make blocking even cheaper.
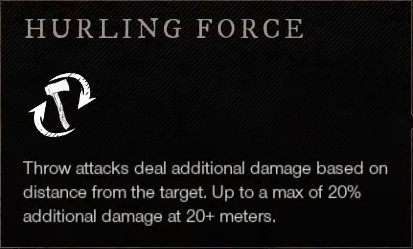
The Hatchet is setup to be this builds ranged option, so having Empowering Rending Throw is a MUST to get that beefy Hatchet damage. Keen speed is the second perk of choice as it allows this build to have great uptime on 20%, 40%, and even 50% haste if all your buffs are up. Vicious is a good option here, but you can also use Vorpal or enchanted for the 3rd perk.
Ideally for general armor perks you want to have Resilient, I am also using the PvP reward track armor for that super great Shirking Heals perk that is also amplified by Sword & Shield’s healing passives. Shirking Fortification is also a great choice for this setup to increase durability even further. I also like Refreshing as a 3rd perk to help with Sword & Shields longer skill cooldowns.
Shirking Energy is always a must for any Light Armor PvP build.
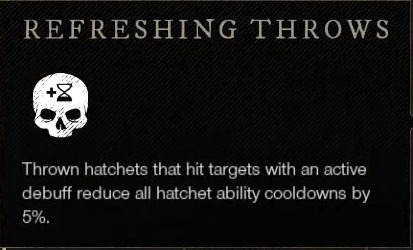
Refreshing Distance Throw is a great perk to have on your armor too as the cooldown reduction is easy to proc, and reducing the cooldown of such a good utility skill is great for PvP!
Health + Divine necklace is a huge must for PvP with Shirking DOT cleanse being super useful against all those DOTs in todays meta. Stamina Recovery would also be a great choice as the 3rd perk! Hearty + Keen Awareness are the preferred Ring perks. I have the PvP track reward ring that has Invigorated Punishment as the 3rd perk for this setup, but crippling is also a good choice since this build is packed with slows. The Earing of this build is a perfect healing Earing for PvP, Mana Toast being especially useful as Mana potions have a very short cooldown!
You will need food to reach the jump points that this build requires, and as always use both Health, Regeneration, and Mana Potions too! The Sword & Shield bar actually has slightly better healing power so try to make a point of using your consumables while on the Sword bar. Both the Oakflesh Balm and Gemstone Dust are great consumables to have slotted incase you need a bunch of extra resists.


Active Skills
Hatchet

Berserk - 5/5 Upgrades
Berserk is one hell of a good skill, offering this build a big damage increase for the duration. On the defensive side of things Berserk also gives immunity to stagger, heals over time, removes all immobilizes and snares when activated, and can also be used to break out of a stun all together! Finally the Haste that Berserk gives can stack with the other sources of Haste that this build has, making the Hatchet bar VERY mobile.

Rending Throw - 3/4 Upgrades
Rending Throw is the important damage skill for throwing Hatchet. It applies a 10% Rend, and thanks to the Empowering Rending Throw Hatchet this build has it will GREATLY increase your ranged damage. Since Rending Throw has such a short cool down already, I opted out of putting the last point in it and instead invested into another Hatchet passive.

Social Distancing - 3/3 Upgrades
A fantastic defensive skill that can snare / immobilize your opponent while also pushing you back a fair distance. You can use this skill to escape out of a bad situation, and can even roll cancel it if you want to use it offensively and not push yourself backwards.
Sword & Shield

Shield Bash - 3/3 Upgrades
A long duration hard stun that has GRIT. This skill is excellent for setting up huge backstabs after landing the stun, giving this build a very deadly offensive combo. The GRIT also makes this a great defensive stun that you can reliably land on foes as well.
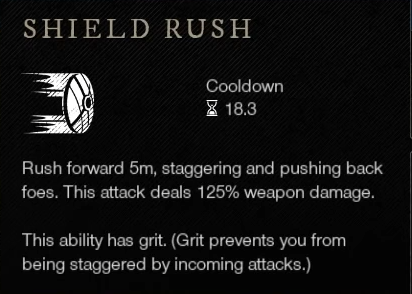
Shield Rush - 3/3 Upgrades
Shield Rush again is a great skill as it offers both offensive and defensive utility. GRIT with a stagger is amazing again as you can reliably come out on top of stagger exchanges, and the Fortifying Shield Rush perk on our shield can make you very tanky after landing this attack. The rush actually moves you forward a decent distance too so you can use it to counter getting rooted!
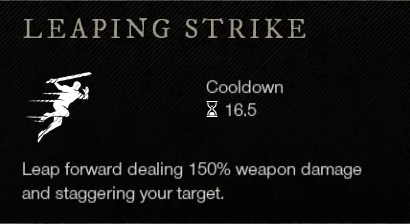
Leaping Strike - 3/3 Upgrades
A very fast hard hitting gap closer that staggers your opponent. Leaping strike is the best way for this build to quickly close distance, and will give a sizable damage boot after it lands thanks to the Empowering Leaping Strike perk on your sword. This skill is also great for quickly escaping from a bad spot!